Cockroach Cloud SQL Connection via SSO with Okta IdP - Go
By Morgan Winslow at
Go application to request 'ID Tokens' and 'Refresh Tokens' from Okta that will be used to authenticate to CockroachDB.

Overview
Today we will be going over how authenticate and connect to CockroachDB Dedicated using JWT tokens. We will retrieve these tokens from Okta, our Identity Provider (IdP). In addition, we will be using Go to more programmatically interact with these tokens.
The high level functions we will create are:
- Retrieve an ID token from Okta. We can issue a POST request to retrieve a new ID Token that will be able to connect to the database. Each new request returns a new token.
- Retrieve an ID token AND refresh token from Okta.
- Use the Refresh token to request a new ID token
The ID token is ultimately what allows a user to connect to CockroachDB instead of a password. An application can also utilize a refresh token to request new ID tokens, rather than the users username and password. This method can let a user stay authenticated while still ensuring good security practices of rotating tokens.
Pre-reqs
There's a few pre-reqs that this article will assume are in place in order to begin.
- A CockroachDB Dedicated Cluster
- An Okta App Integration
- CockroachDB Cluster Settings Configured.
Getting all of the relevant information for steps 2 & 3 is a bit more involved, and not covered in this post. I suggest looking at my colleague's detailed step for step write up of setting up an Okta app integration. These steps will then cover what information needs to be gathered from Okta in order to set the appropriate cluster settings in CockroachDB.
The only difference here is that you will not need to set organization or license information in our example since CockroachDB Dedicated already contains Enterprise features. Below are the 5 cluster settings that will need to be set. Refer to article linked above if unsure of what values to set.
SET CLUSTER SETTING server.jwt_authentication.enabled=on;
SET CLUSTER SETTING server.jwt_authentication.issuers='https://dev-number.okta.com';
SET CLUSTER SETTING server.jwt_authentication.audience='your_okta_clientID';
SET CLUSTER SETTING server.jwt_authentication.jwks='https://dev-number.okta.com/oauth2/v1/keys response string';
SET CLUSTER SETTING server.identity_map.configuration='https://dev-number.okta.com okta-userid-from-admin-url morgan';
Confirm Setup
Once all these items are in place, we can run a couple tests on the command line in order to confirm that our initial configurations are correct. First we will issue a curl command to retrieve an ID token. Then we will use that token to authenticate to the CockroachDB SQL Client.
Set Env Variables
Let's first set some environment variables that we will reference in our test, and again in our code.
export OKTA_URL=<https://dev-number.okta.com/oauth2/v1/token>
export CLIENT_ID=<Okta Client ID>
export CLIENT_SECRET=<Okta Client Secret>
export OKTA_USERNAME=<Okta user>
export PASSWORD=<Okta password>
Get ID Token via Curl
Once you have your Okta setup, getting the actual token is as easy as hitting the API. Before getting into the code, let's run a curl command to test functionality. You'll notice that we need all four of the environment variables. You can read more about the API endpoint in the Okta documentation: here.
curl --request POST \
  --url https://dev-number.okta.com/oauth2/v1/token \
  -u "$CLIENT_ID:$CLIENT_SECRET" \
  --header 'accept: application/json' \
  --header 'content-type: application/x-www-form-urlencoded' \
  --data "grant_type=password&username=$USERNAME&password=$PASSWORD&scope=openid"
After successfully issuing the curl command, search for the field id_token, and save it. This is what we will use to connect to our database, rather than a password.
Connect to Database
Feel free to choose your preferred method of testing connections to your database. Here I will be utilizing the CockroachDB Client.
cockroach sql --url \
"postgresql://morgan:<token>@your-host:26257/defaultdb?sslmode=verify-full&sslrootcert=/certs/your-cert.crt&options=--crdb:jwt_auth_enabled=true"
Be sure to note the options=--crdb:jwt_auth_enabled=true param at the end of the connection string.
Go Implementation
Now we can integrate this authentication flow into a simple Go app. We will be using the tutorial and code here as the starting point of our project.
The final code result can be found here
Env Variables
First things first, let's set our environment variables in our main(). We will be using these throughout the app.
oktaUrl := os.Getenv("OKTA_URL")
clientID := os.Getenv("CLIENT_ID")
clientSecret := os.Getenv("CLIENT_SECRET")
oktaUsername := os.Getenv("OKTA_USERNAME")
oktaPassword := os.Getenv("PASSWORD")
OktaResponse struct
I went ahead and created a response struct even though we only care about id_token and refresh_token. And only id_token in the simplest example.
type OktaResponse struct {
    RefreshToken string `json:"refresh_token"`
    IdToken      string `json:"id_token"`
    TokenType    string `json:"token_type"`   // Not used in this demo
    ExpiresIn    int    `json:"expires_in"`   // Not used in this demo
    AccessToken  string `json:"access_token"` // Not used in this demo
    Scope        string `json:"scope"`        // Not used in this demo
}
Get ID Token
At this point we pretty much just need to build our code up the same way we did in our curl. This function will accept all the environment variables above as input params.
func getIDToken(oktaUrl string, clientID string, clientSecret string, oktaUsername string, oktaPassword string) string {Set Data
oktaUsername and oktaPassword were both passed into the func, while grant_type and scope are required per the documentation.
form := url.Values{}
form.Add("grant_type", "password")
form.Add("scope", "openid")
form.Add("username", oktaUsername)
form.Add("password", oktaPassword)
Create and Issue Request
Our POST request headers are pretty straight forward. And then we need to utilize the clientID and clientSecret for our Auth.
req, err := http.NewRequest("POST", oktaUrl, strings.NewReader(form.Encode()))
req.Header.Set("Accept", "application/json")
req.Header.Set("Content-Type", "application/x-www-form-urlencoded")
req.SetBasicAuth(clientID, clientSecret)

client := &http.Client{}
resp, err := client.Do(req)
if err != nil {
    panic(err)
}
defer resp.Body.Close()
Extract id_token from Body
We will utilize our struct in order to Unmarshal the data and get a handle on only the id_token field
body, _ := ioutil.ReadAll(resp.Body)
var result OktaResponse
if err := json.Unmarshal(body, &result); err != nil { // Parse []byte to go struct pointer
    fmt.Println("Can not unmarshal JSON")
}

return result.IdToken
Build Connection String and Connect
Using your newfound ID token, build your SQL connection string with your CockroachDB details.
dbURL := "postgresql://" + sqlUser + ":" + idToken + "@" + host + ":26257/defaultdb?sslmode=verify-full&sslrootcert=" + cert + "&options=--crdb:jwt_auth_enabled=true"Let pgx do the rest
Once you build your connection string, pgx makes it easy to parse out the values into a config for connection.
config, err := pgx.ParseConfig(dbURL)
if err != nil {
    log.Fatal(err)
}

config.RuntimeParams["application_name"] = "$ docs_simplecrud_gopgx"
conn, err := pgx.ConnectConfig(context.Background(), config)
You should now be connected to CockroachDB by using an ID token!
Bonus - Refresh Token
Now let's take a look at using a very similar process, but using a refresh token instead.
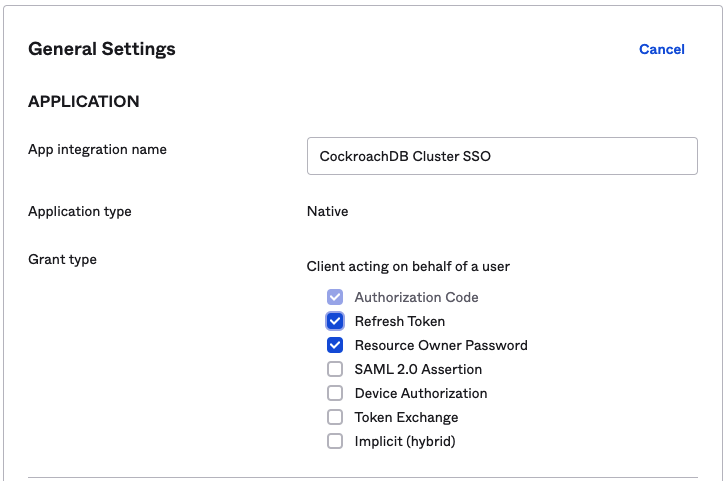
Configure Okta Application
Ensure you have the "Refresh Token" grant type checked in your Okta application.
getIDToken() Updates
There are only two very small updates to our original function.
Add
openid offline_accesstoscopefieldform := url.Values{} form.Add("grant_type", "password") form.Add("scope", "openid offline_access") form.Add("username", oktaUsername) form.Add("password", oktaPassword)Return refresh token in addition to ID token
return result.IdToken, result.RefreshToken
Use the Refresh Token
Now that your function has been updated to return both an ID token and refresh token...now what? Well first you can use the returned ID token to connect to the database just as before. But if you want to get a new ID token? That's where our handle on the refresh token can come in.
Create New Function
This new function will be very similar to the ones we have already created. The nicest difference is only passing in the refreshToken, rather than a username and password entered by the user.
func useRefreshToken(refreshToken string, oktaUrl string, clientID string, clientSecret string) (string, string) {Set Data
Again, very similar. No more username and password, different grant_type, and added refresh_token
form := url.Values{}
form.Add("grant_type", "refresh_token")
form.Add("scope", "openid offline_access")
form.Add("refresh_token", refreshToken)
The rest of the POST request body is identical
Return new ID token and Refresh Token
This func is now reusable and will return a new ID token and refresh token every time*
* This may or may not be true depending on your timeout settings.
return result.IdToken, result.RefreshTokenConclusion & Next Steps
You should now be able to connect to CockroachDB using an ID token, and also set the groundwork for using a refresh token. Most of the work involved ends up being on the Okta application side, which can definitely get a bit tricky if not familiar. But once all variables are in place, the workflow can be very powerful.
Next steps include adding or tracking expiration of tokens and refreshing based on these times. We can also explore testing these connections out in conjunction with connection pooling.